In Part 1, we began to discuss the importance of oxygen sensor voltage codes. Voltage codes can be caused by sensors that are bad and stuck lean or rich. These codes can also be caused by lean or rich running conditions. The case studies we will focus on will look at pre-cat oxygen sensor codes, both caused by parts other than the O2 sensors. When you get an oxygen sensor voltage code, the first step will always be to test the sensor. On some failures, like gross vacuum leaks, this can be difficult. The best way to test the sensor is by artificially enriching the system with propane to see if the sensor goes rich, and then seeing if the sensor can go lean afterwards. Once you have proven the sensor is good, it’s time to do some drivability diagnosis.
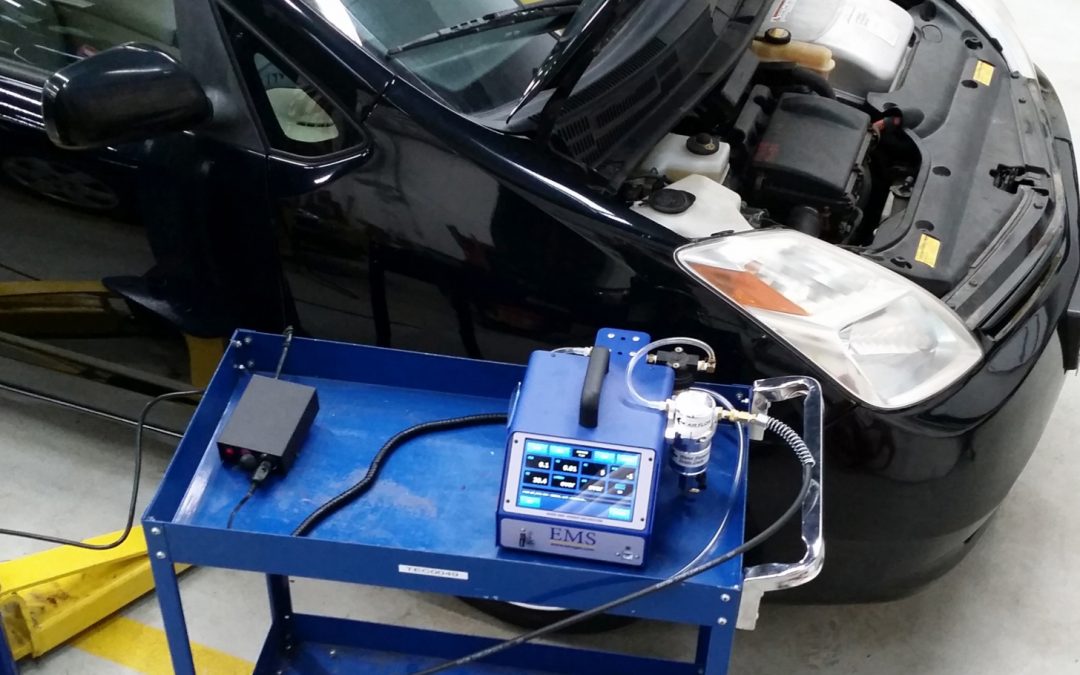
A 1999 Chevy G3500 van with a 5.7L engine came to me with a MIL on and no power. This van was most likely overloaded, so a drivability concern did not help. I took it for a test drive up a slight hill, and I was worried that the van would not make it to the top.
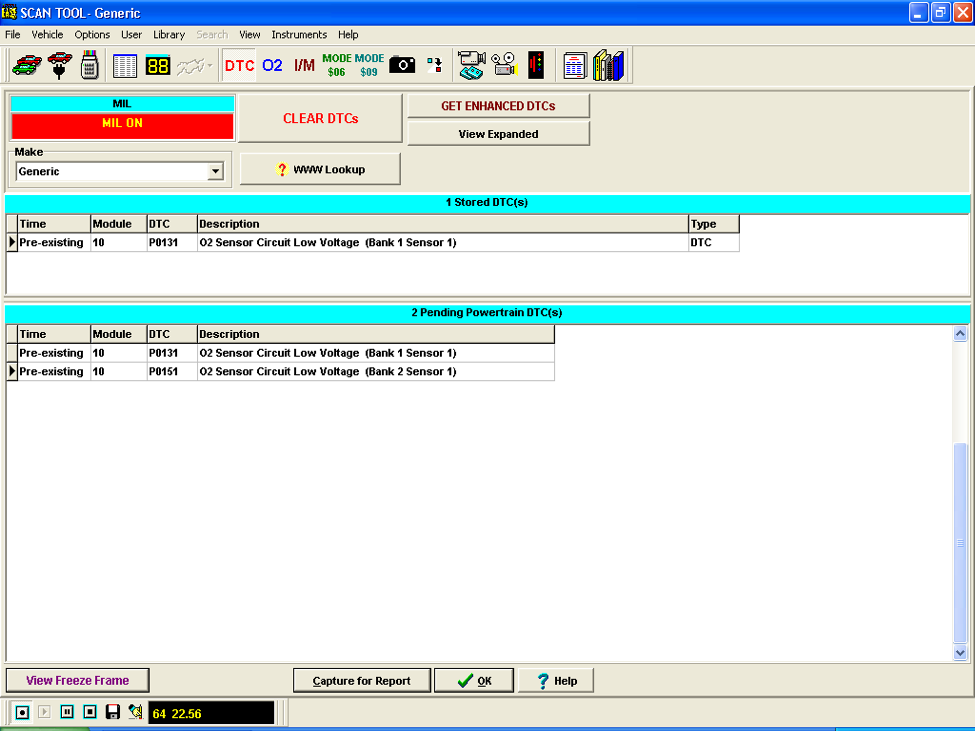
The vehicle had a P0131 code and pending P0151. The code description for these were O2 sensor circuit low voltage B1S1 and B1S2, respectively.
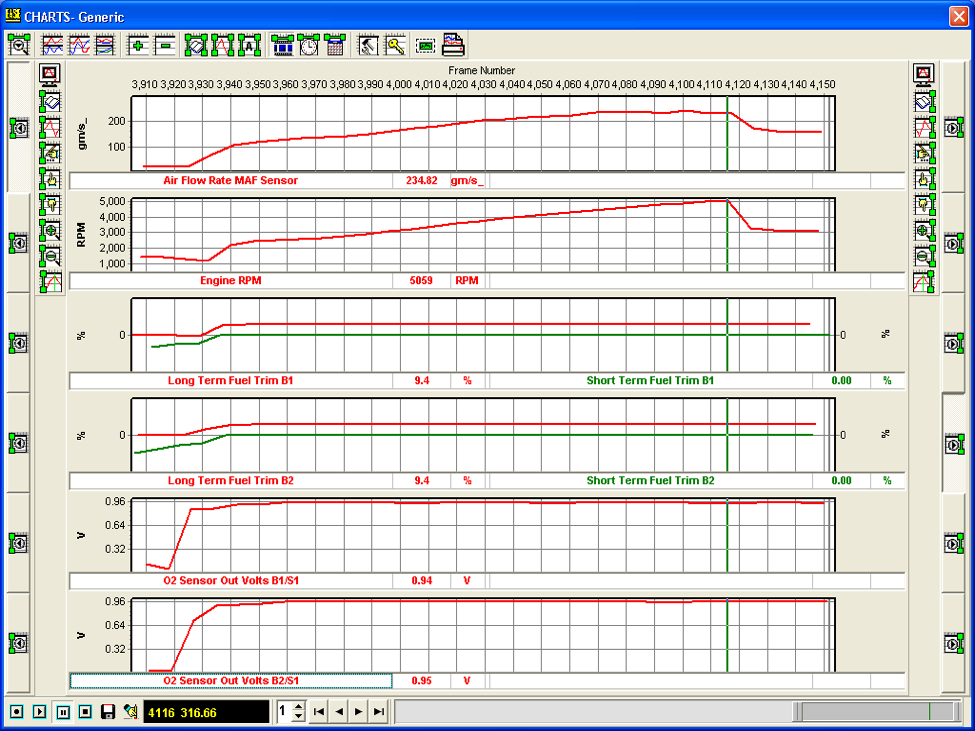
After pulling codes, I took a look at the oxygen sensors. I noticed two brand new sensors had been installed on the vehicle. New parts are always a suspect to me, however when I tested the sensors, they passed. Anytime I have a drivability problem, I like to look at fuel trims and see how well the engine is breathing. I noticed at idle that the fuel trims were actually negative, which is rich. (I will refer to the total fuel trims for the rest of this article, which is the combination of short-term and long-term trims.)
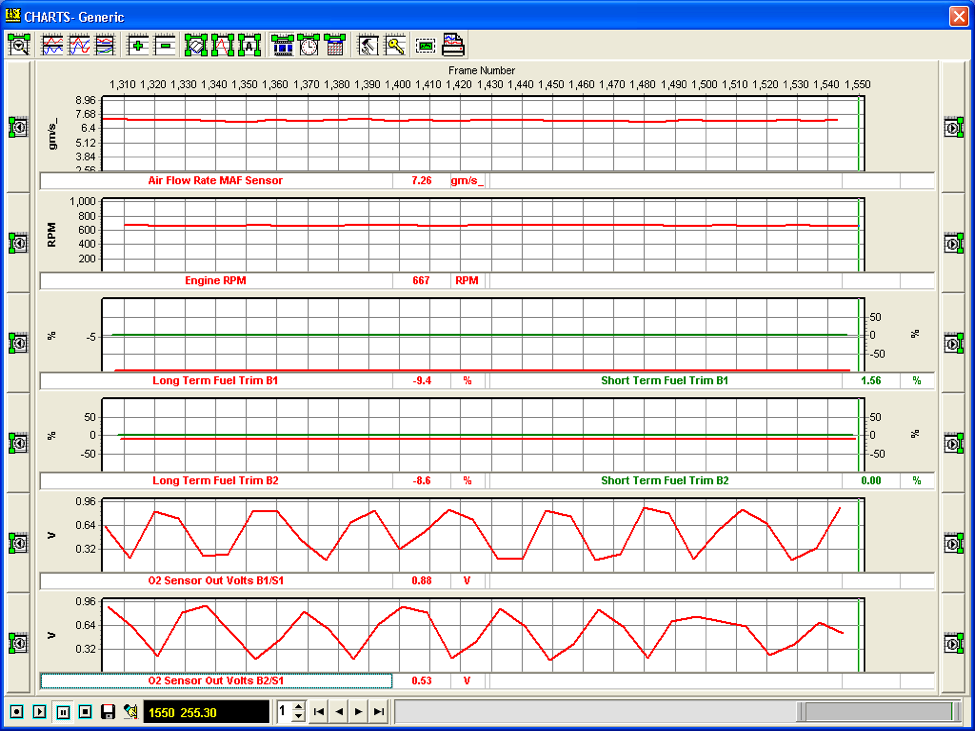
As I raised the RPM, the vehicle began to lean out.
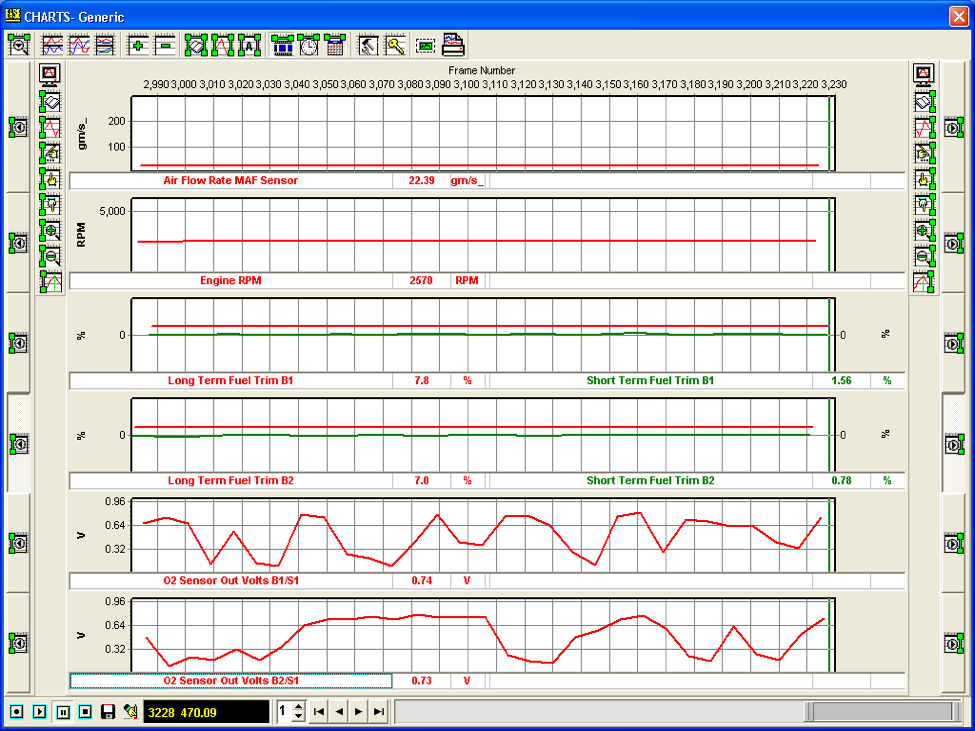
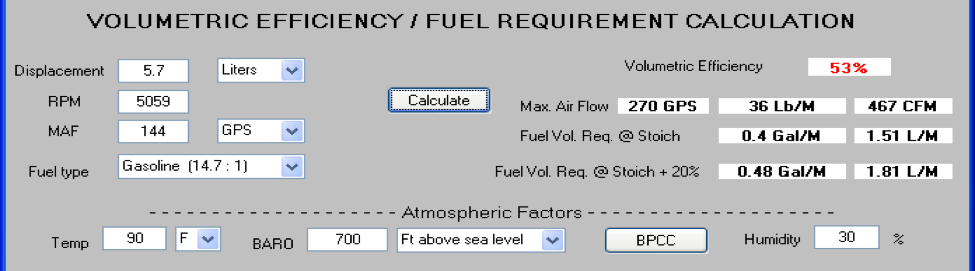
At this point, I wanted to do a volumetric efficiency test to see how well the engine was breathing. During the VE test, I was also looking at the pre-cat oxygen sensors to see if the engine was being fueled properly. The vehicle lacked acceleration during the VE test. (The peak RPM and mass air flow need to be in grams per second to calculate VE.)
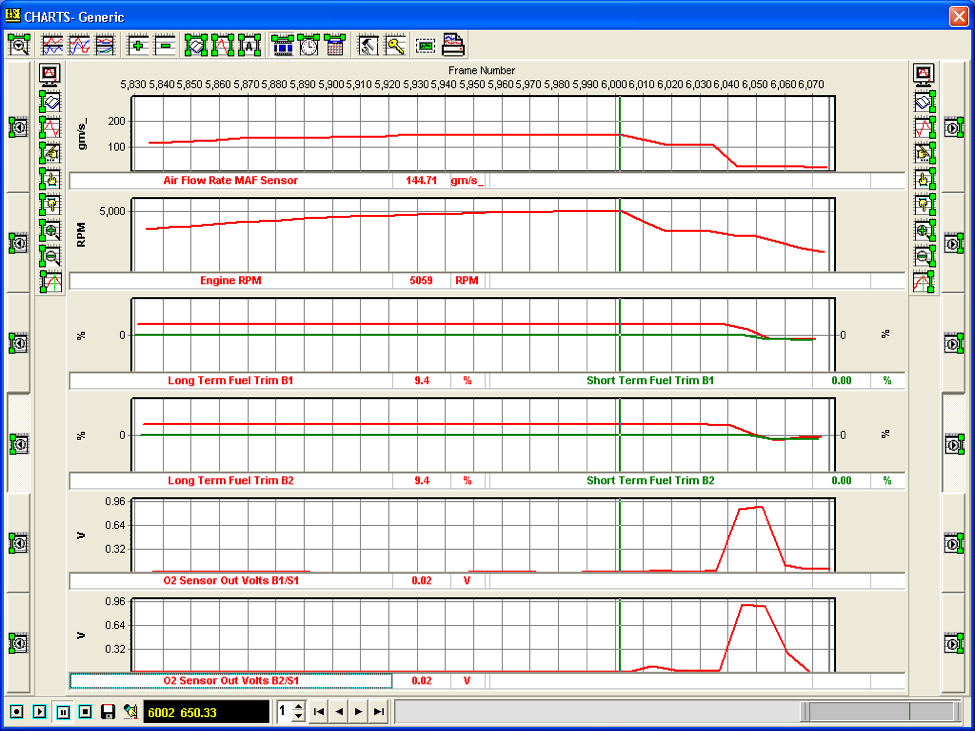
Notice that the oxygen sensors pegged lean during the test drive. The vehicle was not getting enough fuel, but there wasn’t any issue with the actual fuel delivery system (fuel pump, filter, injectors). There was an issue with the fuel calculation. Using the VE calculator, we found that the engine was only 53% efficient.
When an engine has low volumetric efficiency, the root cause must be found. Based on the fuel trims, I did not believe that the exhaust was clogged. Low VE combined with positive fuel trims typically point towards a bad mass air flow sensor. The final test for this MAF was to check the fuel trims at a steady cruise.
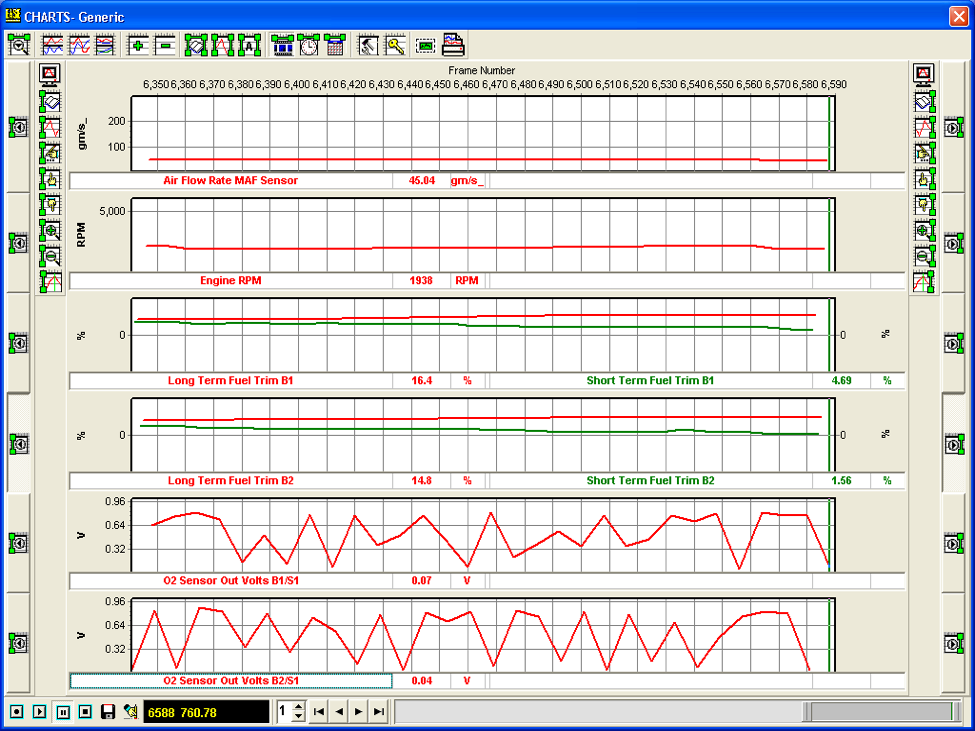
Overall, the VE was 53%, which is very low. On this particular engine, I expected to see 75% or higher. The fuel trims went positive at a steady cruise and were negative at idle. Based on this information, I checked the intake tubing for cracks and found none. A new MAF sensor was installed, and the vehicle was taken for another test drive.
Notice that the oxygen sensors now went rich. The vehicle had plenty of fuel at a wide-open throttle run, and the vehicle’s acceleration had been restored.
The great thing about fuel trims and VE testing is the ability to confirm your repair.

The volumetric efficiency now rose to 86%.
This vehicle had oxygen sensor voltage codes caused by a lean condition. It is important to utilize fuel trims and volumetric efficiency testing to aid in diagnosing these issues. Too often, the oxygen sensor is the first part to be replaced when in my experience oxygen sensor codes are rarely caused by bad O2 sensors. Many OEM testing charts can lead technicians down the wrong path. It is important to think independently and gather as much data as possible. The great thing about scan data is the ability for technicians to share it via email and iATN to consult each other. It’s always okay to phone a friend in our industry.