When diagnosing oxygen sensor codes, it is extremely important to focus on the code description when determining a diagnostic path. OBDII defines 36 O2 sensor codes, and there are many more on the manufacturer side. The first step is to determine what type of code the vehicle has. O2 sensor codes descriptions fall into the following categories: circuit problem, low voltage, high voltage, slow response, no activity or heater circuit problem. Each of these code descriptions are very different, yet can be cause by the same failures. There is some variance among the manufacturers when it comes to code and monitor strategy. Oxygen sensor voltage codes are an example of this, low or high voltage could be caused by a slow or no response sensor or even a weak heater. They can also be caused by drivability issues as well, and these are the failures that technicians can find to be challenging.
The most common O2 sensor voltage codes are:
P0131 – O2 Sensor Circuit Low Voltage B1S1
P0132 – O2 Sensor Circuit High Voltage B1S1
P0137 – O2 Sensor Circuit Low Voltage B1S2
P0138 – O2 Sensor Circuit High Voltage B1S2
P0151 – O2 Sensor Circuit Low Voltage B2S1
P0152 – O2 Sensor Circuit High Voltage B2S1
P0157 – O2 Sensor Circuit Low Voltage B2S2
P0158 – O2 Sensor Circuit High Voltage B2S2
When a technician gets an O2 sensor voltage code, step 1 will be to determine if it is a sensor issue or engine performance issue. Most driveability techs will use scan data for this. It will depend upon the car how you approach this, but try to get the vehicle lean and rich to see if the sensor moves low and high. If the sensor changes OK, focus on engine performance. Treat a low voltage code like a lean code, and treat a high voltage code like a rich code.
There is also manufacturer specific O2 sensor voltage codes as well, they can be diagnosed in the same way. For instance, Ford uses P1131 and P1151 instead of the P0131 P0151 often.
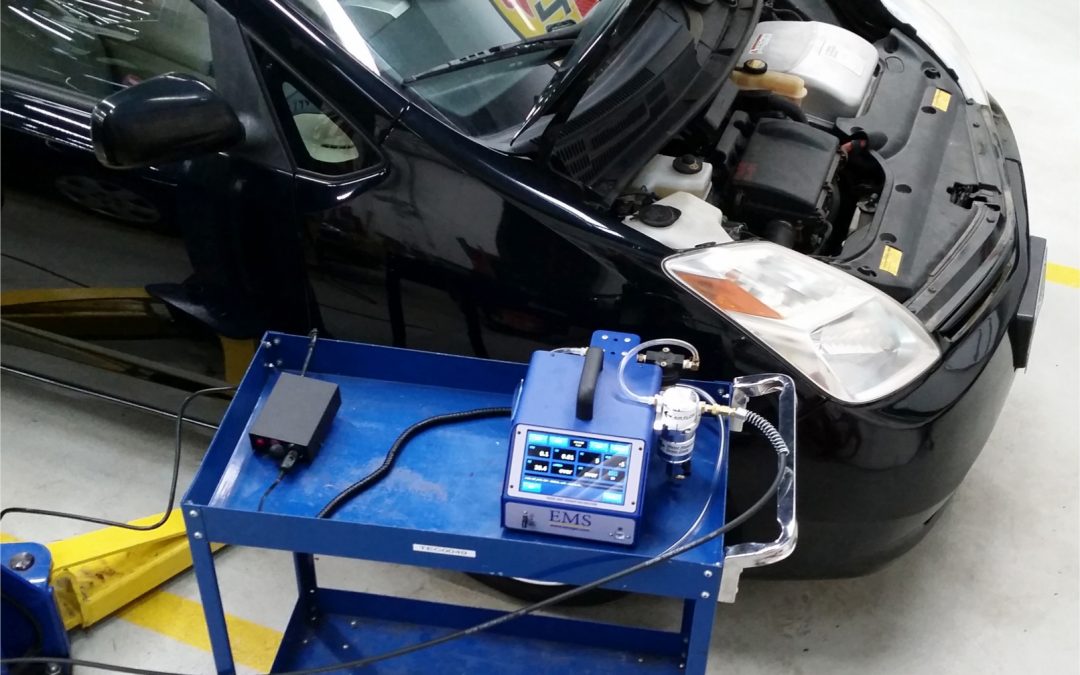
I had a 2005 Toyota Prius 1NZ-FXE that needed to pass emissions by the end of the month. The B1S1 HO2S has already been replaced, and the MIL is back on. I scanned the vehicles for codes and found a P0138 (Fig. 1). I am by no means a hybrid guru, however this is an engine driveability problem and the process I use to diagnose this code is no different than a non-hybrid Toyota.
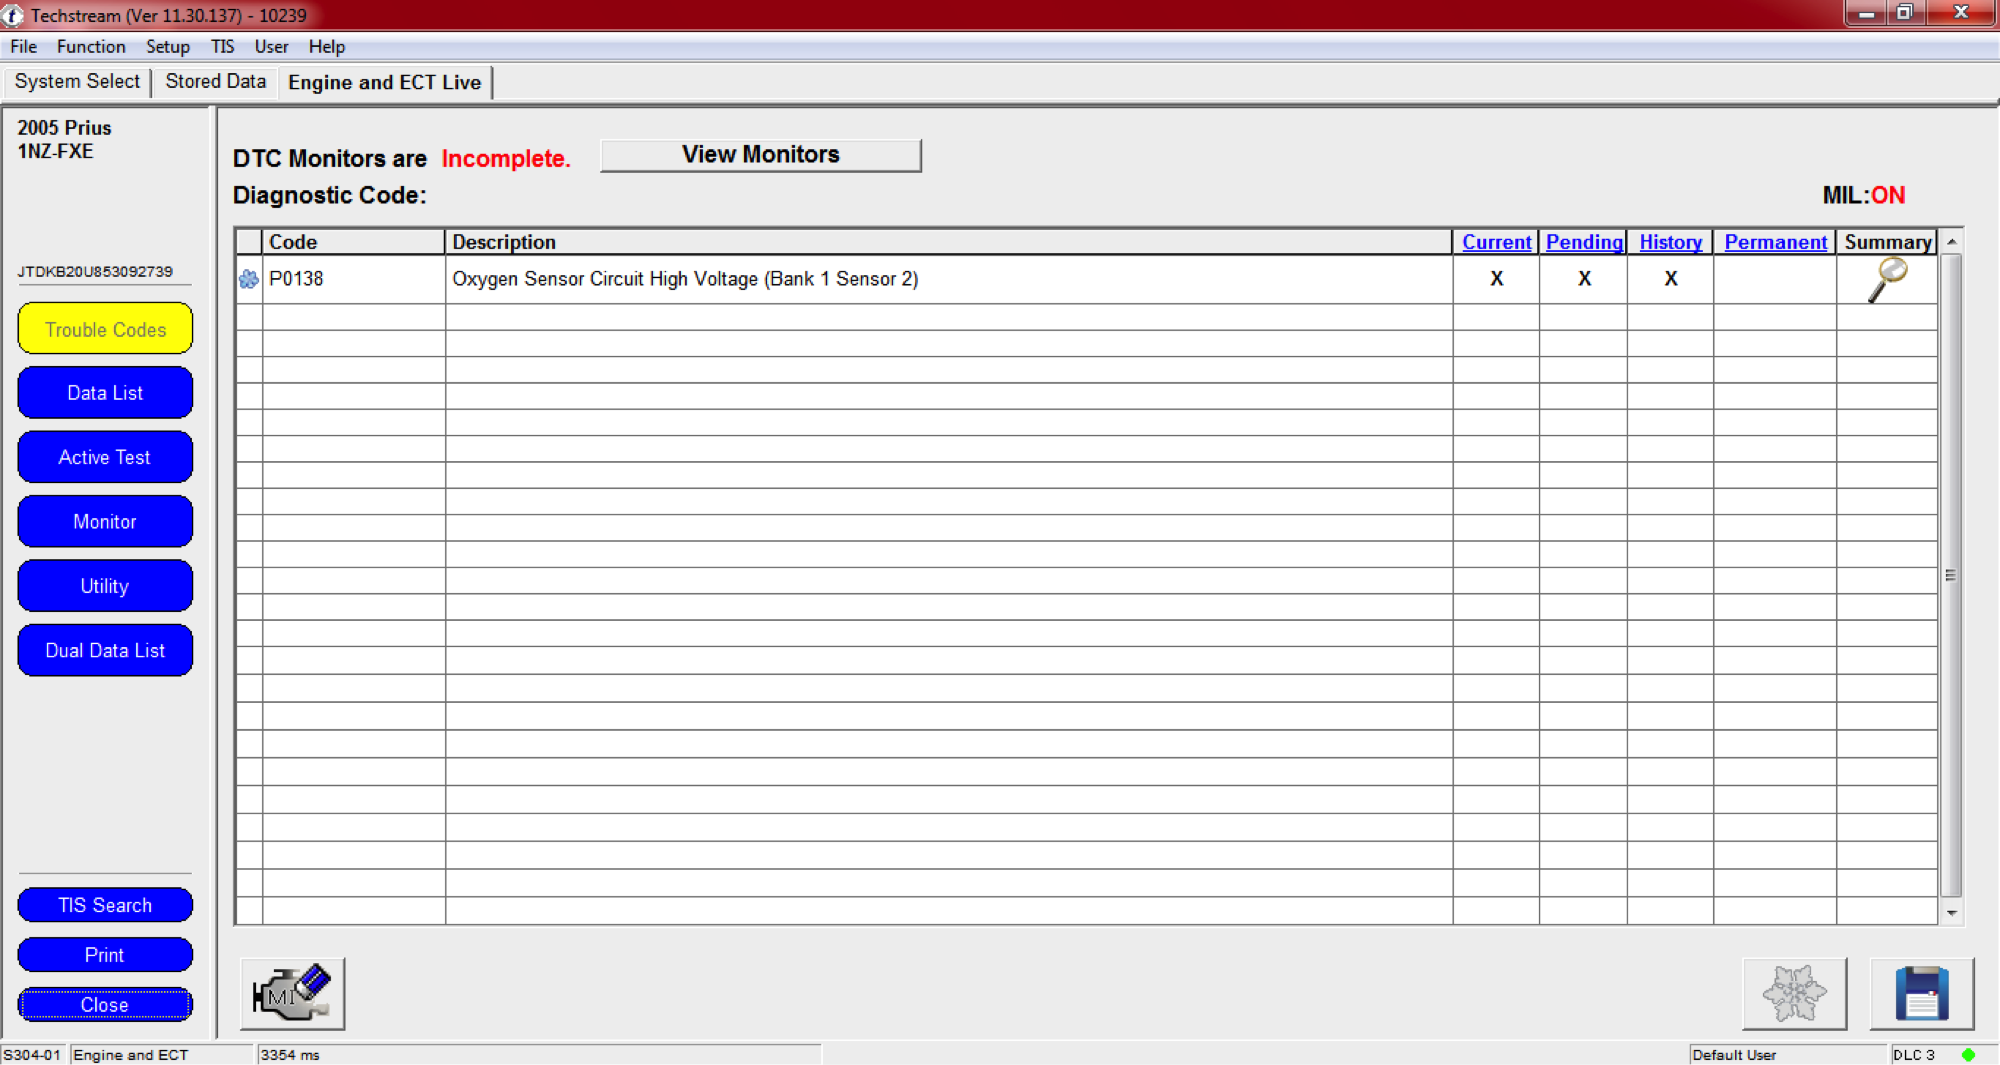
(Fig. 1)
Using a Techstream I checked the freeze frame. One advantage to using a Techstream on Toyota/Lexus/Scion is the amount of information it gives. I have over 100 PIDs of data available, over 5 frames. Frame 0 is at the time of the code, frames -1 through -3 is the time leading up to the failure, and frame 1 is after the code has set. There are two pieces of information I want to check in this freeze frame, fuel trims and O2 sensor voltage. The freeze frame confirms that the B1S2 voltage is high at 0.87 volts. The total fuel trims are also around 8%, which is way too high for a Toyota. If a Toyota is ever outside of a -5% to 5% range, something is broken. (Fig. 2)

(Fig. 2)
Time to do some diagnostics. Since this is a hybrid “starting” it only puts it into ready mode. The engine will turn on and off as needed. I want the engine to run in the bay like a non-hybrid. To do this the vehicle will need to be put into inspection mode. The procedure to get this generation Prius into inspection mode is:
- Turn the power switch ON (IG)
- Fully depress the accelerator pedal twice with the transmission in the P position
- Fully depress the accelerator pedal twice with the transmission in the N position
- Fully depress the accelerator pedal twice with the transmission in the P position
- Check that the HV warning lamp flashes on the multi-information display
- Start the engine by pushing the power switch, de-pressing the brake pedal
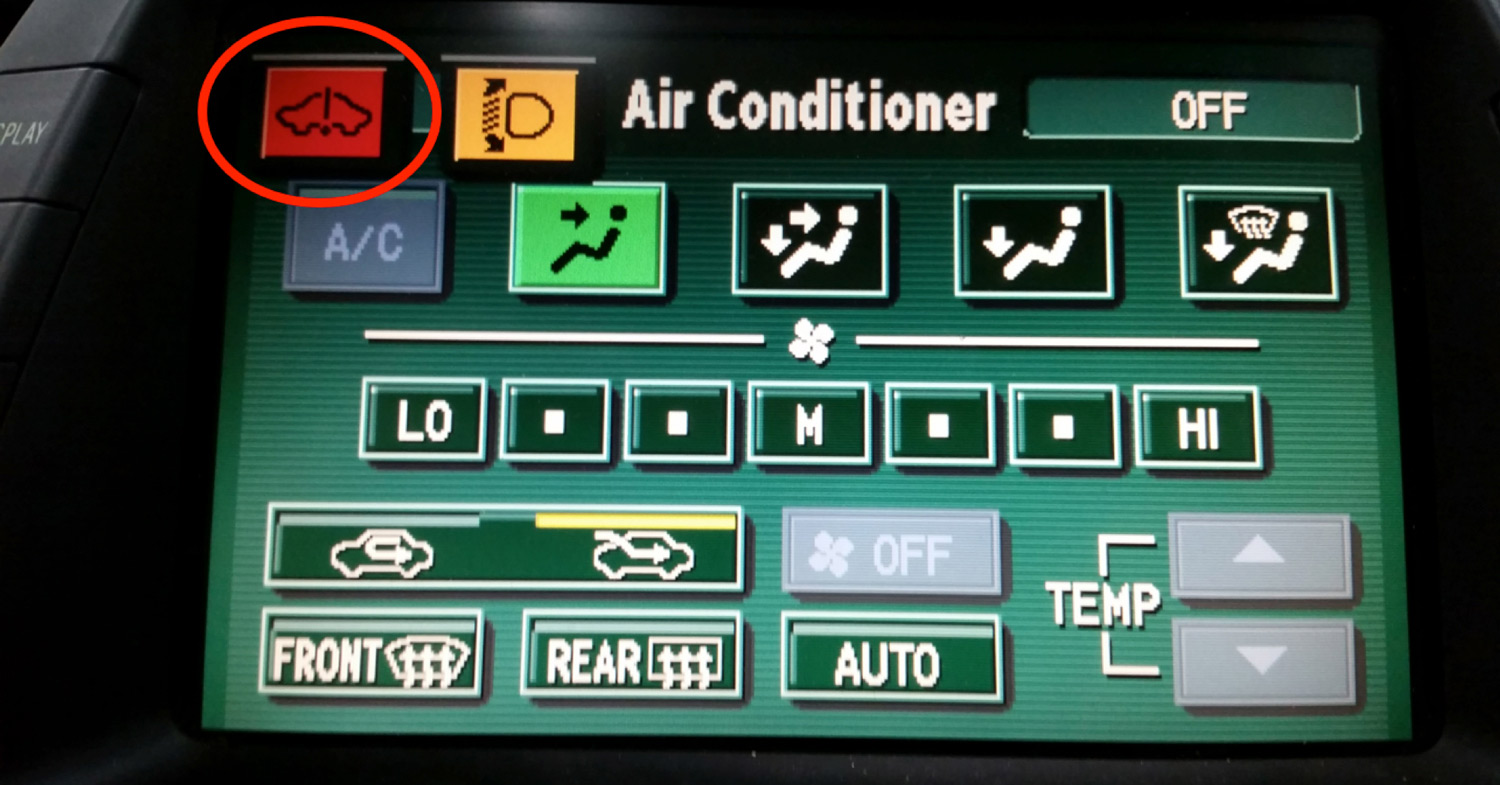
(Fig. 3)
Once the engine starts in inspection mode a red car symbol will appear on the center display. (Fig. 3)

(Fig. 4)
After going into inspection mode and letting the engine warm up I looked at some live data. The actual air/fuel ratio is spot on with the target air/fuel ratio. The B1S2 voltage is high, just like the freeze frame. The fuel trims are also too high. (Fig. 4)

(Fig. 5)
I suspect that the engine is running too rich due to a skewed air/fuel sensor. The air/fuel sensor is a high authority sensor. As the sensors degrade over time they can send bad information back to the PCM. The rear O2 sensor however tells me that the car is running very rich. There is only one way to accurately check the A/F sensor, and that is with a gas analyzer. A gas analyzer will allow me to compare the actual air/fuel ratio to what the sensor thinks. (Fig. 5)
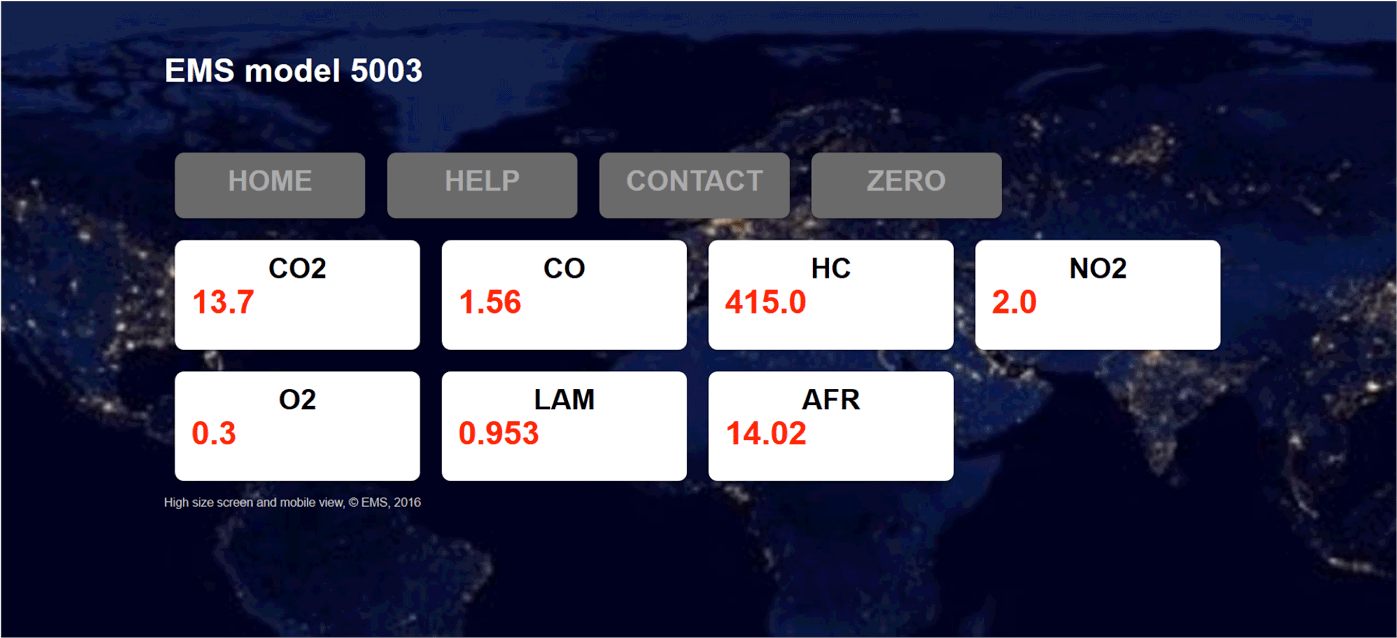
(Fig. 6)
The PCM thinks the lambda is close to 1. Using a gas analyzer, I quickly find that the air/fuel ratio is actually 14.02:1 and the lambda is 0.953. I also notice high hydrocarbons at 415 PPM. The gas analyzer should show lambda close to 1, since that is what the PCM thinks. It is now clear why the post cat oxygen sensor voltage is high, the vehicle is truly running too rich. Without using the gas analyzer, replacing the A/F sensor would be a guess. (Fig. 6)
(Fig. 7)
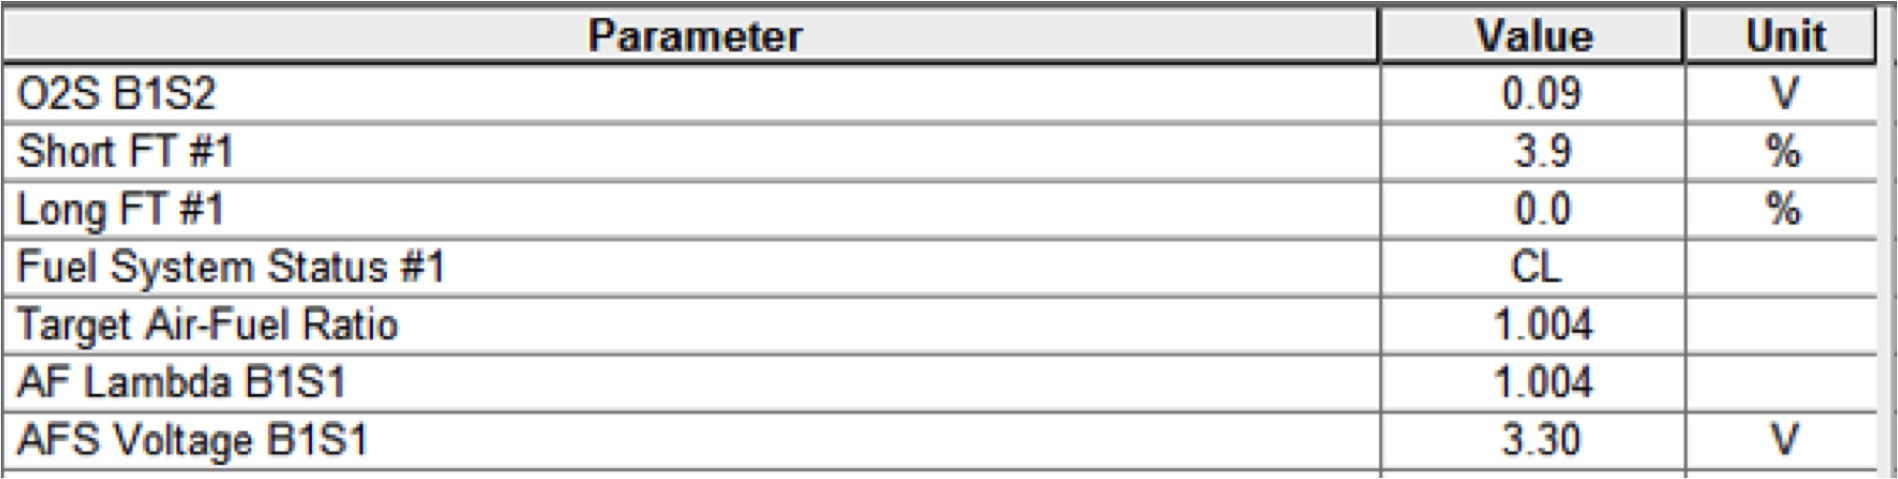
I replaced the A/F sensor. Using scan data and the gas analyzer I can easily confirm the repair. The fuel trims are within spec now and the B1S2 HO2S is no longer stuck rich. (Fig. 7)
(Fig. 8)
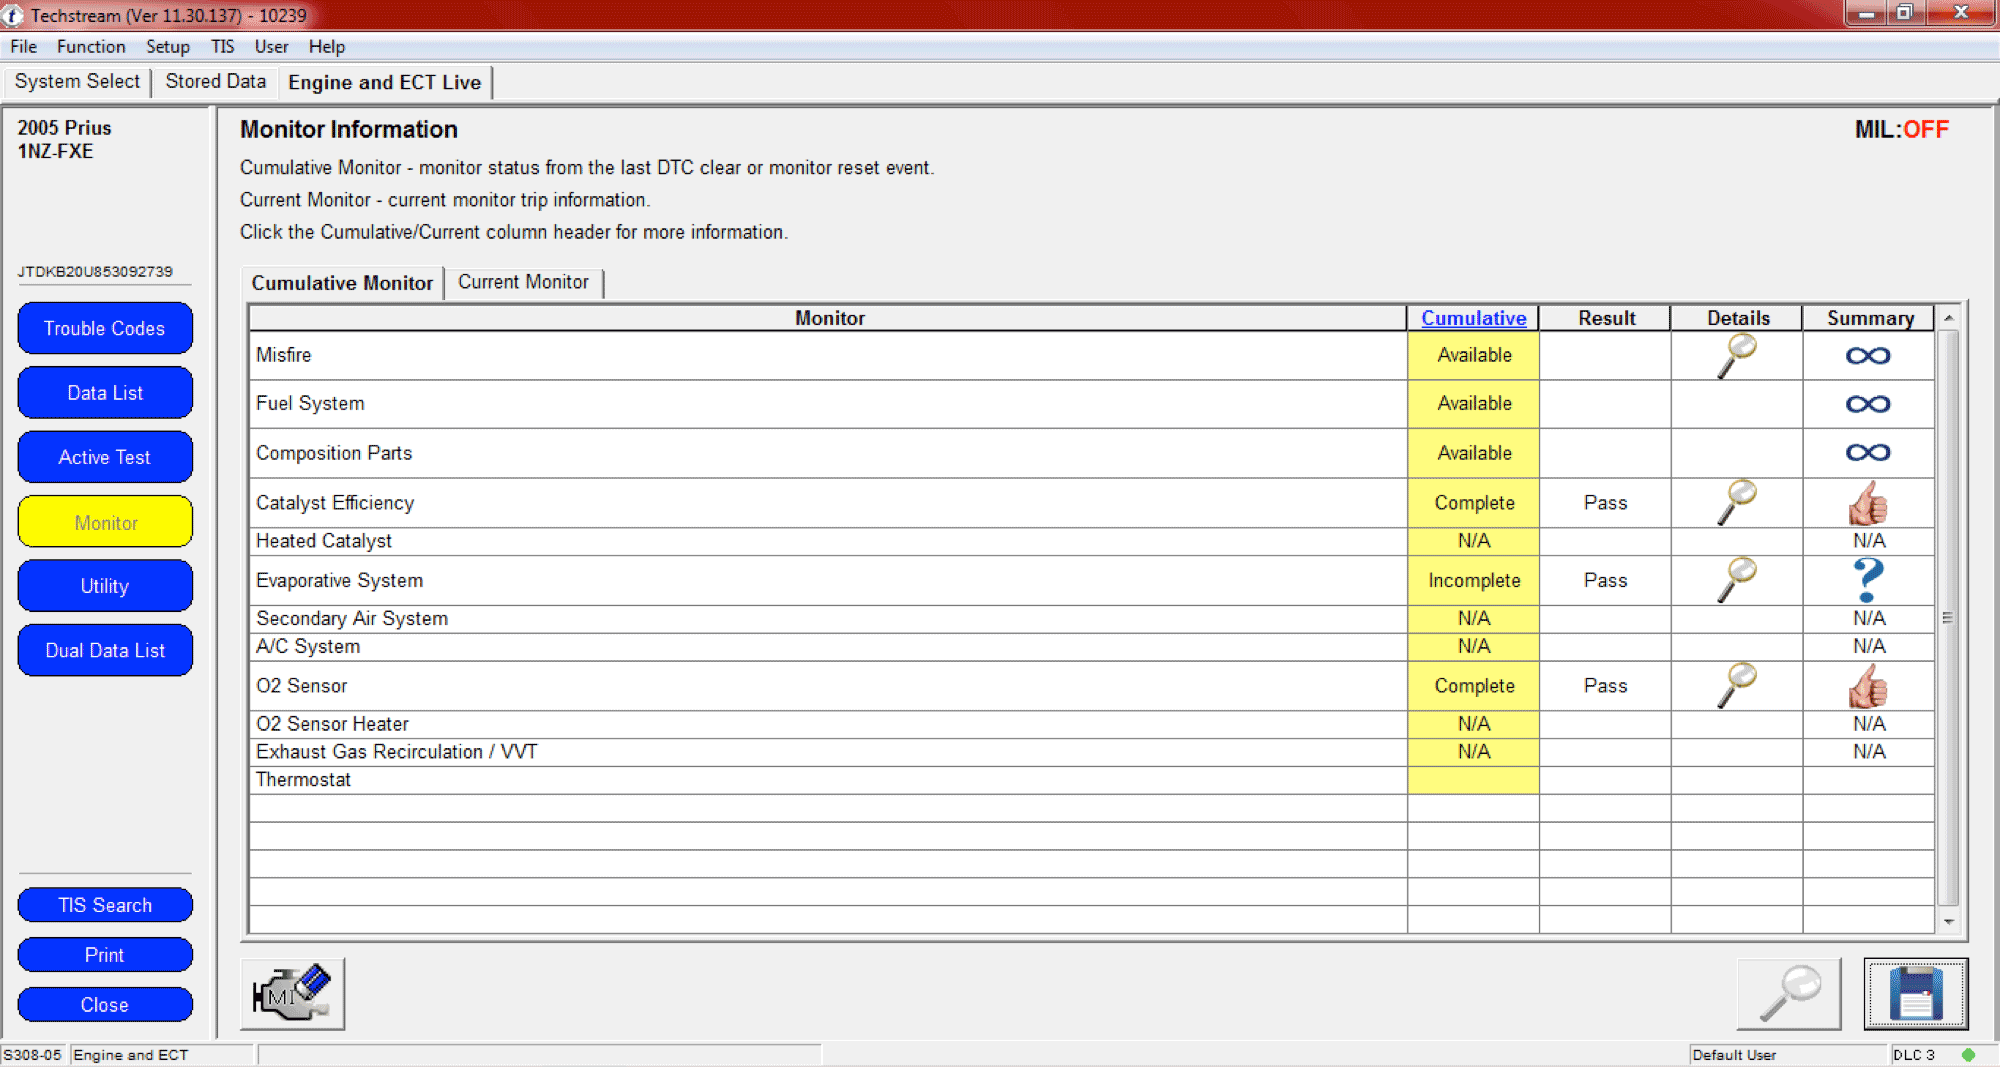
I took the vehicle out and ran all of the monitors, except EVAP. No codes came back, and the vehicle passed the state emissions inspection. (Fig. 8)

(Fig. 9)
The gas analyzer also shows a lambda and air/fuel ratio that is much closer to what the PCM thinks. The hydrocarbons are also under control now. (Fig. 9)
 Article By:
Matthew Shanahan
Listen to his Technician.Academy podcast here.